Each mother of the needlewoman can please her child with new knitted hats, scarves or mittens, but you can also give a beautiful, warm and comfortable shirt front to your boy or girl by the beginning of the cold weather season. The main advantage of the shirt front over scarves and sleeps is obvious, but undeniable - reliable protection of the neck from wind and frost. They are very tight to the body, and keep on the neck due to its shape, which is very important for children.
Children's dummies do not just warm the neck and neck, they also look very cute, but in order for a child to love this knitted product, it is better to make it with clasps or buttons. Then the procedure of putting on the shirtfront will be easier and more pleasant.
The scheme and description of knitting crotched crochet for children
We have previously talked about how to knit the front lines with knitting for adults and children, and now let's take a closer look at the options for crocheting children's cuffs. Knitting crochet collars is not difficult, the main thing is to follow the recommendations and knitting patterns.
However, before you knit, you should be reminded of the simple rules for calculating the loops for the future of the shirt-front. Often taken to take into account the following formula: 1 cm - 2-3 loops. However, this is very inaccurate data, as the large role in this matter is played by the thickness of the yarn, the density of the pattern, the size of the hook and the manner of knitting the needlewoman. Therefore, one should first associate a sample of the future product, for example, 10 cm in size. The number of loops included in the sample will be the most reliable indicator. Many also advise you to iron the sample through gauze before counting. Thus you can protect yourself from mistakes and the dissolution of knitting, thereby saving time and nerves.
How to tie a simple model for a child

Let's try to start with a simple, but beautiful model of a shirt-front for kids, convenient because it is buttoned. The color of the yarn here will be decisive in the question of knitting a product for a boy or for a girl. This simple dickey hook for a child is suitable for the age of 1.5-2 years. You can crochet the shirt front to a different age simply by recalculating the number of loops.
Materials for work:
- children's Pekhorka yarn (200 m / 50 g) - 1.5 hank;
- buttons - 5 pieces;
- hook number 2.
Progress with step by step photos:
Dial a chain of air loops (35 loops +1 for lifting). Knit the strip with crochets for this width (35 loops).
Important: to get the effect of gum, you need to stretch a new loop only behind the back wall of the previous row.
The result should be a strip. According to this example, there are 60 rows. In order not to be mistaken with the size, in the process of mating should try on a strip on the neck of a childby folding it in half lengthwise. The resulting ring should not be tight to the neck, but should not be too free.
Tie one edge of the strip with crochets. It is logical that we get the number of loops equal to the number of rows of the strip, which in this case is equal to 60 loops.

Next you need to knit on the principle of raglan. Take the scheme below as a basis, this is the classic version of the raglan crochet. Important: on the diagram, double crochets, for our model, you need to knit with single crochets, just behind the back wall of the previous row. It seemed to me that it was not enough to have one air loop forming an angle; I knit 3 air loops in each turn of the canvas.

The calculation of the loops on the shoulders, front and back is simple: divide the total by 4, and this will be one side (back, shoulder or front). In this case, 60 loops are divided by 4, it turns out 15 loops. At the front of the back is taken the extra 3 loops. Before it is divided by 2 (after all, the shirt front is planned on buttons, respectively - there will be 2 shelves).
As the rows are added, the width of each part will grow.
And if you fold the collar strip in half lengthwise, as during the fitting, and lay out the rest according to the resulting corners, the product will begin to resemble its final appearance.
Next, 16 rows of raglan are tied. It is convenient to determine the desired size by trying on a blank for the child’s clothes (the edges of the product should almost coincide with the lines of the shoulders on the blouse).

Knit front shelves to the length that is planned for buttons. In our case, 14 rows are added.
In the process of mating the 15th row, connect both shelves, dividing them with three air loops. Thus, the width of the front and back is equalized (remember, we “took” 3 loops per back when calculating the loops on the raglan sides?). The gap formed between the shelves is necessary for convenience. If the shelves are located close to each other - there will be no place for buttons.
Add a few more rows - in this case 8.
Left shelf
Tie it on the edge with crochets. When you reach the collar - tie both halves at the same time. The top will not puff up, disturb when worn. Draw another 3 rows with crochets on this edge.

Important:the resulting strip of 4 rows of strapping ideally closed the distance between the shelves. For this purpose, and served those 3 air loops that separated the right and left shelf.
Right shelf
Bind the edge with crochets. The second row is also a single crochet, with arches of air loops at an equal distance from each other. The size of the arch depends on the selected buttons, try on. The third row - columns without nakida.
Tie the edge of the product with any variation of the border, for example, the simplest "fans" of 4 crochets. Sew on buttons. T-shirt collar is ready!

Simple shirtfront for a boy

Choosing a reliable protection for the neck of an active baby, the most correct way out of the situation will be the dickey hook for the boy. Even its inexperienced needlewoman can link its simplest version rather quickly, and the child will be happy with the new thing, especially if it is knitted with yarn in his favorite color.
As mentioned above, it is worthwhile to bind the sample in advance in order to correctly calculate the required number of loops for further work. Having decided on the size of the future dickey, we begin to work with our data according to this example.
Materials for work:
- yarn, selected for the season;
- hook according to the yarn.
Working process:
To start knitting you need to dial the right amount of air loops. It is important to remember that the elastic band is stretched, and that it fits tightly to the throat, it is better to check the results obtained when measuring the sample. When dialing, keep in mind that the final number of air loops should be a multiple of two, as the gate is knitted with a 2x2 rubber band.
The crocheted pattern of an elastic band is an alternation of facial and purl embossed columns (pc). In order to make it softer and more elastic, you can add an air loop between the posts.
The first row is connected with single crochets (Art. BN), the hook is inserted into the third loop from it. Last Art. connects with the first one, in case you chose the round neck version (if you prefer the shirt front with buttons, you need to finish the row with two air loops, then turn the product over and start the next row). Next will be described the knitting method "round".
The second and subsequent rows start from the 2nd century. lifting. The very principle of knitting relief columns comes down to the following:
- The hook is inserted from the front side from right to left into the front loop of the previous row and the relief face (convex) crochet is knitted.
- A hook from right to left is inserted into the back loop of the previous row and a relief crocheted (concave) crocheted column is knitted.
- We continue the alternation of facial and purl RS to the end of the series.
- At the end we connect the last and the first one.
- Knitting 2 in. p, proceed to the next row. We perform work similarly to the previous one. row, adhering to the schematic drawing. The only difference is that now the hook is not inserted into the front or rear loop, but covers the leg of the post.
After the desired neck height is reached, proceed to the expanding part. Neck height depends on your preference. You can make a low gate, then it is enough to knit 36-40 rows. For a high hemmed gate, more rows will be needed.
The scheme of the expanding part of the shirtfront is presented in one of the easiest ways. Adding loops can be achieved by crocheting two loops with two crochets in each loop.
The first row begins with 4 ce. Next, do two articles. with two bows in each loop. We conclude a series of comics with two nak-mi.
The second row also begins with the 4th air. pet In the next loop one Art. with 2 nak-mi, in the other two art-ka with 2 nak-mi. Thus, alternating the sequence to finish a row of art. with 2 nakida.
Third row: 4th air. pet., one st-ku with nak-ohm in the next two loops, then in two loops of two constants.
Fourth row: 4th c. p., in the following 3 p. one by one. with two nak-mi, and two Art. with two in the next.
Fifth row: 4th ce, in 4 loops one st-ku with two nak-mi, and then two art. with two in the next loop.
The description of the knitting process indicates that with each row the number of loops in which one st-tc with two nacks is knitted increases, and only one st-k with two strings follows. Thus, it is necessary to knit from 8 to 15 rows. Depending on how the product will cover the shoulders.
Starting from the 8th row, the columns can no longer be added, but can be tied up by 1 st-ku with two lines in kn. Reaching the desired length of the expanding part of the loop are closed. At the same time try not to tighten them. Otherwise, the edges will be too tight and spoil the external impression, and will not lie flat on the shoulders.
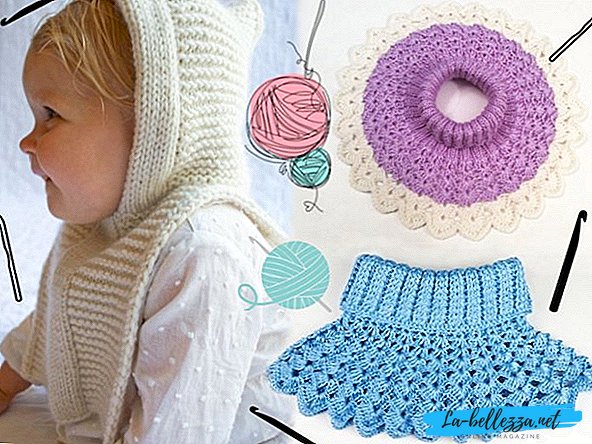
Openwork model for the girl

Any girl will like the openwork machine with beautiful wavy edges, which is perfect for golf, blouse or dress, adding to the image of a cute children's charm. Dicky crochet for girls fit in quickly, and the result pleases both the child and mother. In this case, the number of loops is designed for a girl of two years.
Materials for work:
- yarn "Pekhorka children";
- several types of hooks - from №1.5 to №2-3.
Pattern knitting scheme:

Progress with step by step photos:
The smallest of the hooks that we have (in this case, №1,5) we collect a chain of 130 air loops and join them into a ring. This is for an approximate head circumference of 50-52 cm of an average child from 2 years.
We make one air loop for lifting and we knit the whole row with double crochets.
Next, we collect 3 air loops for lifting, do a nakid and wind the hook under the lower crochet column, stretch the loop and knit it. Obtained facial relief column.
Now you need to link the seamy embossed column. To do this, make a nakid and pull the loop from the back side.
Alternating facial and purl embossed columns, we should have this series. This is the so-called crocheted gum.
After we knit 15 such rows, we knit 15 more rows with single crochets.
When these 15 rows are completed, it is time to proceed to the shoulder portion of the shirt-front. We collect 3 air loops for lifting and knit the entire series with double crochets, adding another 10-15 columns for expanding the product.
Now we proceed to knitting a pattern, which we will knit according to the scheme below. Here we just need hooks of different thickness.
We start the pattern with the crochet, which knitted the neck. We knit 3 rows and change the hook to a thicker one. Again, we knit 3 rows and change the hook to an even greater thickness. And so to the desired length of the product. The optimal length for the shirtfront is just below the shoulder, otherwise it will restrain the movement of the arms.

Video for beginners
As a guide to knitting dibs, crochet for beginners will be useful to watch video workshops from professionals. In this case, it will be about knitting for beginners - the shirt-front crochet for the child. This video will vividly show the process of knitting the shirtfront, which is suitable for both the boy and the girl.
Crochet lesson video